
Tips and Tricks: DIY Dungeon Tiles
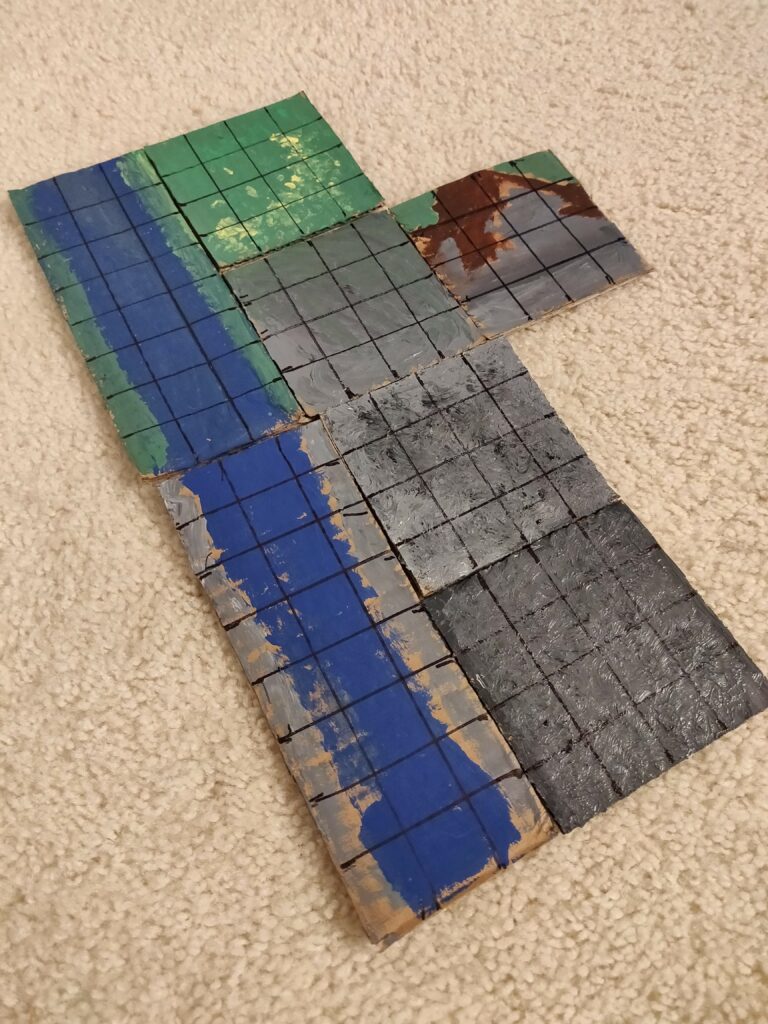
This project will leave you with some cool custom tiles like the ones shown in the header image, and they were a lot of fun to make with kiddo (helping him practice measuring, using a ruler to draw lines, painting together, etc)!
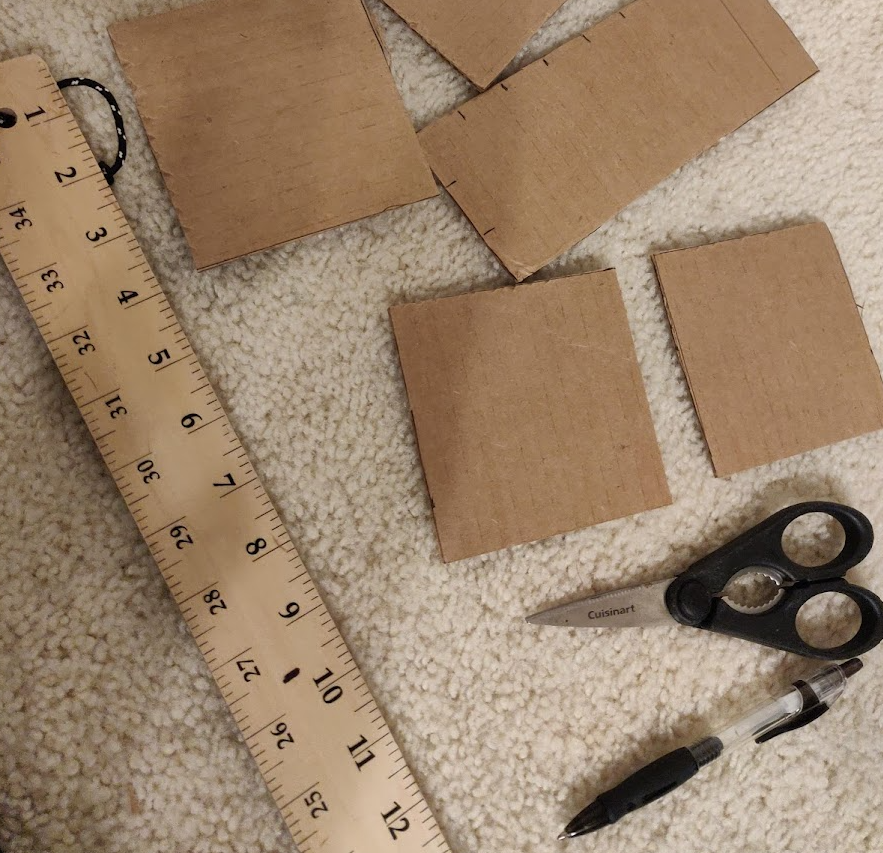
Step 1: Gather your materials
First, you’ll want to get your materials together from this list or something similar:
- Cardboard (we reused a shipping box)
- Ruler
- Scissors
- Paint supplies (dollar store acrylics can work great)
- Sharpie
Some possible suggested swaps are to use foam board (we can typically get this from the dollar store) instead of a cardboard box and using a box cutter instead of scissors to get a cleaner edge. We used what we had with the goal to keep the cost as low as possible.
In total, this cost us a little bit for the paint, and everything else was something we already had at home. If you were buying everything from the dollar store, including the cardboard, this would most likely come out to about $10 – $15 for about a dozen tiles, depending on how many paints you wanted to get.
Step 2: Cut to your desired dungeon tile size
Once everything is ready, determine what size you want your dungeon tiles to be, measure them out and draw guidelines to help with cutting, and then cut them out from your cardboard.
We made 4″ x 4″ tiles and 8″ x 3″ tiles to have some variation, and we also cut some 4″ x 2″ titles that we might use later but hadn’t finished painting by the time of posting. You can choose any size you want, but make sure that they all follow some kind of scale so they’ll line up when you add grid marks later.
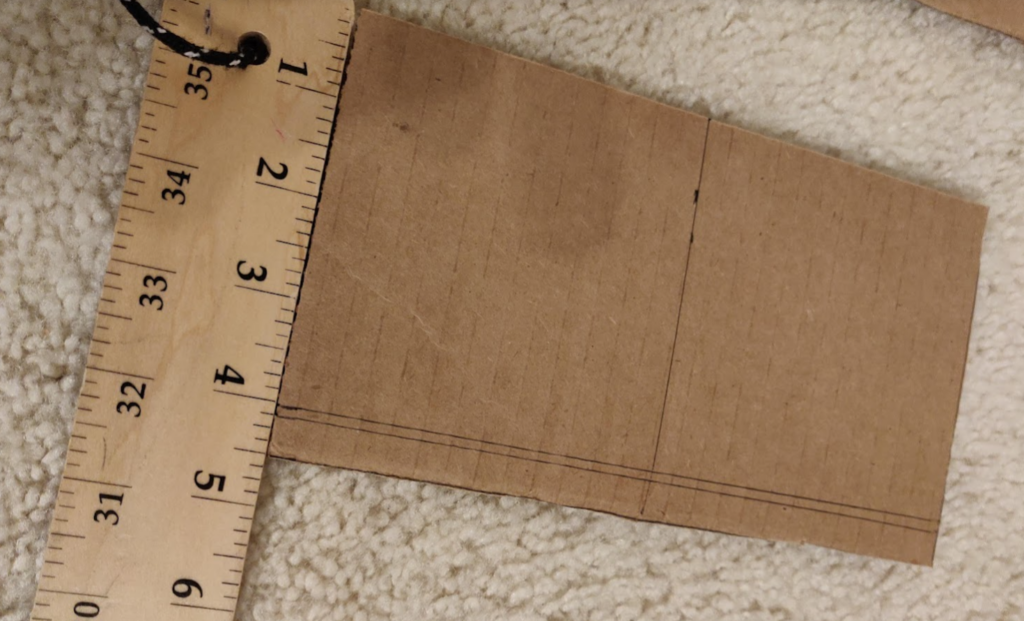
I also recommend to carefully watch your edge cutting! If you want a lot of these to line up into a large map, small variations on your cutting angle can add up quickly. We used scissors to cut our dungeon tiles, so I cut them a smidge bigger than I actually wanted and then trimmed the edge down once they were removed from the main piece so that I could get it really straight. If you’re using a box cutter, this might be a little easier.
Step 3: Paint your dungeon tiles
This was the part that kiddo particularly loved! Now you get to paint your tiles!
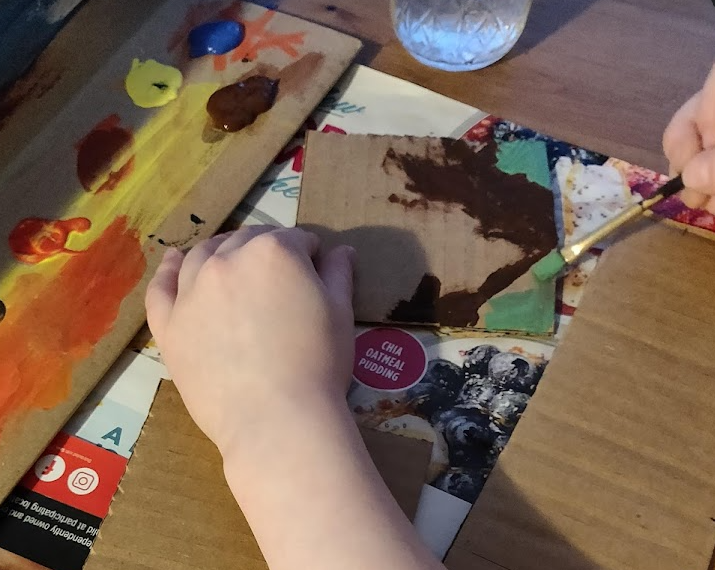
I let my kid get creative and paint what he wanted, and he came up with a river and a muddy bank a “dirty floor” for his tiles. For mine, I experimented a little bit with dabbing gobs of paint over the first layer and swirling some colors to bumpy floor like you’d find in a cave along with making a little meadow tile and a river to match with kiddo’s piece.
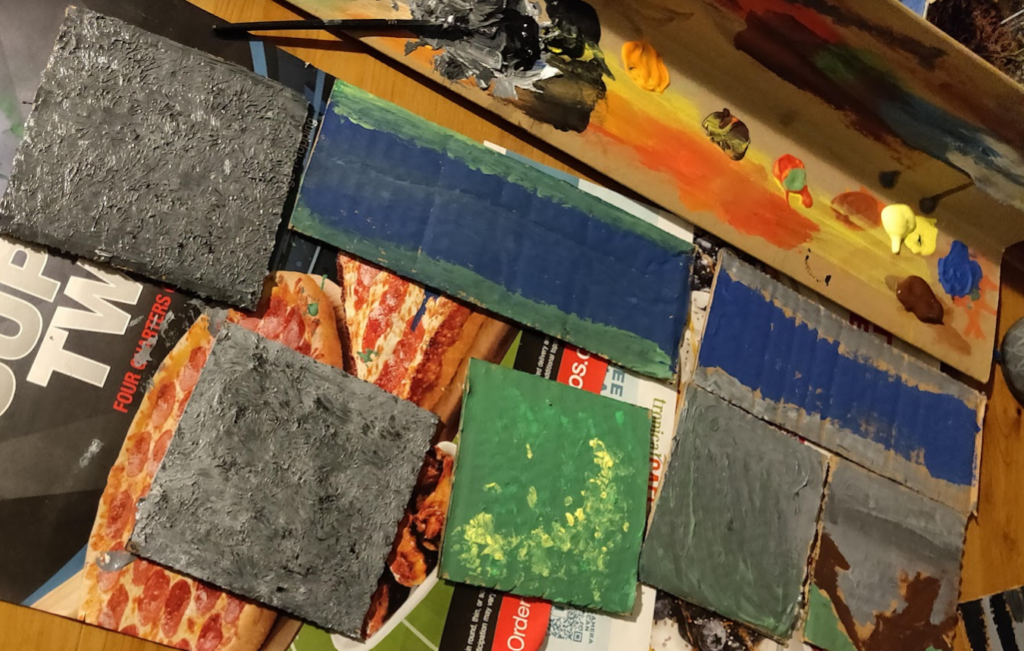
We used acrylic paints and didn’t dilute them with water in order to get them to cover the brown color of the cardboard well. If you’re using black or white foam board or put down a base coat of black or white, it might be a little easier to get vibrant colors or use different types of paints (like water colors).
Step 4: Add lines to your dungeon tiles
Once the paint on your dungeon tiles is fully dry, you can add lines to make them gride marked for game use.
Use your ruler to mark on all edges where you want your lines to go then use a straight edge (like the ruler) to draw a line connecting the adjacent marks.
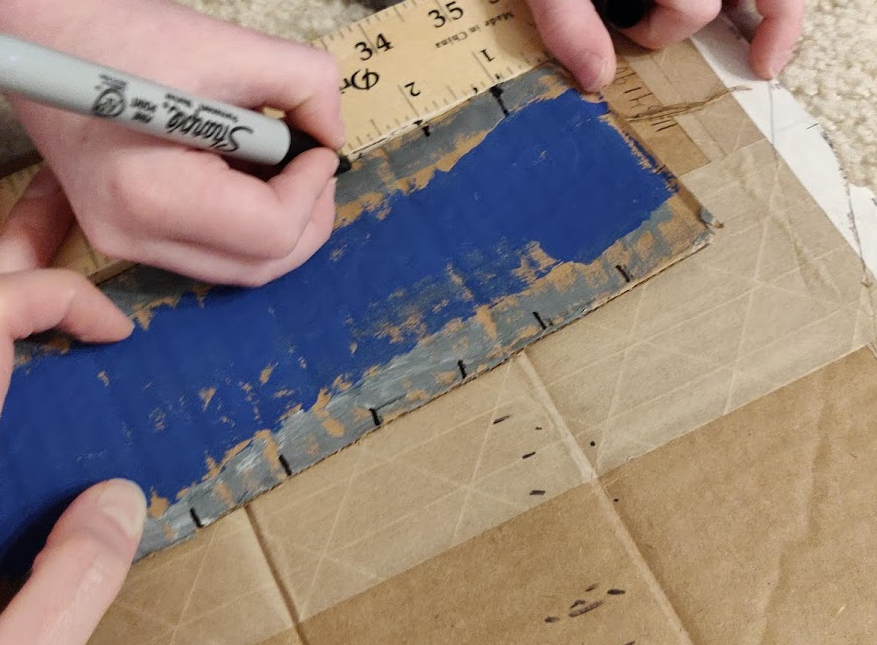
What I really liked about this was that I showed kiddo how to do it, and then he was able to do it on his own pieces too (so it isn’t that hard, and it got him practicing some major planning and find motor skills)!
When all your lines are added, you’re ready to use your dungeon tiles!
I hope you enjoyed the craft and get to try it out at home, and happy gaming!
If you liked this post, make sure to subscribe to the TTRPGkids monthly newsletter to stay up to date on the latest reviews, tips and tricks, game and podcast list updates, and more! Thank you for playing tabletop RPGs with your kids and sharing this awesome hobby with the next generation!
1 thought on “Tips and Tricks: DIY Dungeon Tiles”