Tips and Tricks: DIY Area of Effect Aide for TTRPGs + Geometry Lesson for Young Kids
This DIY post will leave you with a simple game aide made from household/dollar store materials that you can use in any game with a grid board, but that can be particularly helpful in TTRPGs for kids.
This guide also explains how you can present this to your kids in a way that helps them understand core geometry concepts that they’ll need later in life and in school.

DIY Game Map Measuring Aide – area of effect overlays/visualizations
In many TTRPGs, from D&D to indie games, spells and other moves have area of effect (AoE) zones that are critical to fully ustilizing your character’s abilities. These are often described with terms like “20ft radius” or “15ft cone” or “10ft diameter circle”. However, a lot of schools don’t teach geometry concepts like what radius or diameter is until kids are in a certain grade level, meaning that these concepts can be new or unknown for young players (like my pre-1st grade 6yo).
To help with teaching these ideas or giving a visual representation of the concept to my kid, we made overlays out of construction paper! This helps with our game AND it helps to give him a heads up about concepts he’ll learn later in school by using tactile and visual respresentations.
Step #1 – Gather supplies for your AoE game overlays
For this craft, you will need:
- Construction paper
- Scissors
- A pen
- Wrapping paper with a 1″ grid on the back (I got mine at the dollar store, and this is what I use for my game maps as well)
If you can’t find wrapping paper with a 1″ grid on it or you are playing a game that has a different type of grid (i.e. 2″ grids or hex tiles), there are grid templates that you can print out online to use for this as well, or you could use a ruler to measure your shapes directly onto the construction paper.
I used the wrapping paper for our AoE aide tools because it was something we had available, and it helped show kiddo how exactly what we were doing related to our maps by letting him interact with it (drawing on it, cutting it, etc). This emphasized how it was a direct connection to our game play area, and it was fun for him to cut up something we would typically use as a map.

Step #2 – Draw common action or spell AoE shapes on your map grid
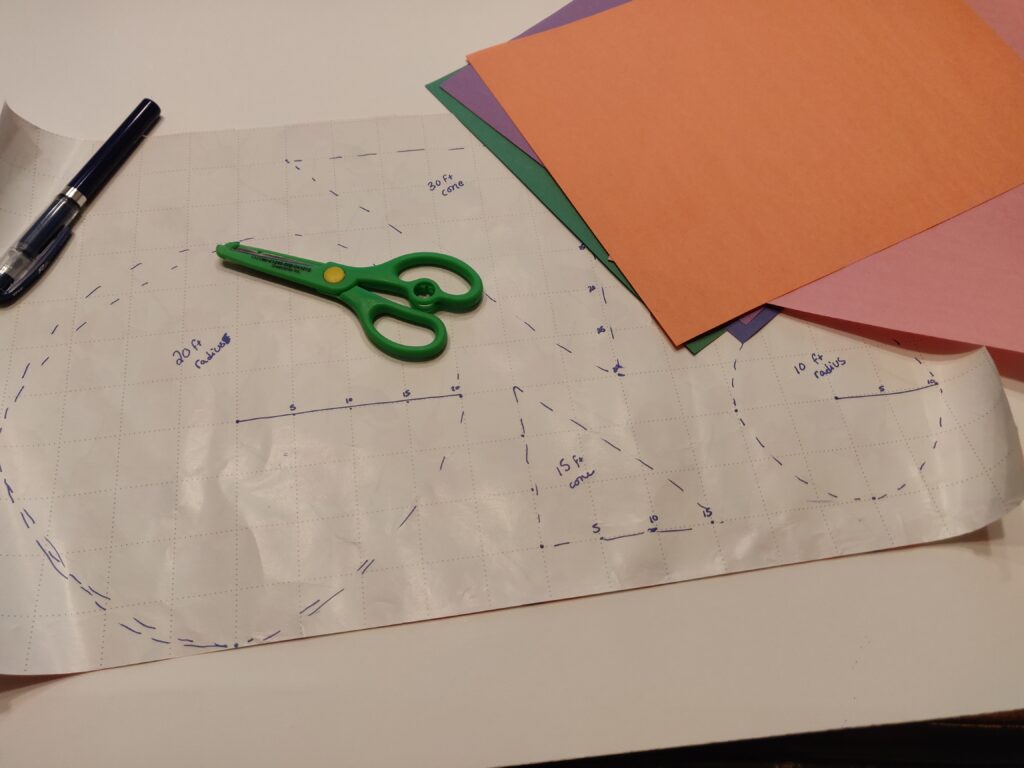
Next, mark points on the grid to measure out your shapes, and label them, where applicable.
For ours, we choose to make two circles that were based off radius measurements and two right triangles based off side measurements since these seemed like they would show up in our game the most.
For the circle AoE shapes, I marked a center point and then counted by fives to mark points at the top, bottom, left, and right of the center point. I explained to kiddo what a radius was and let him mark dashes lines (sometimes with a couple tries to get the curve right) between the points to make the circle. I then drew the radius lines and labeled the shapes.
For the triangle AoE shapes, I marked the apex (the right angle point) and then counted by fives out from there to mark two points, measuring the legs. Like with the circles, I let kiddo connect the dots, and I pointed out how some of our lines followed the grid and how one (the hypotenuse) went across the squares and looked a little longer. I then labeled the shapes.
Doing both of these with kiddo (getting ready for 1st grade) and explaing the process helps him to understand:
- Counting by fives (2nd grade skill)
- How to measure shapes (2nd grade skill)
- Various geometry concepts like 1″ unit squares, terms, and more (1st through 4th grade skills)
* Grade levels based on Michigan Common Core Standards
Note: some people and games interpret the 15 ft cone differently, so keep that in mind when choosing how to measure it. We used a right triangle because it was a homebrew game with just us, and I wanted to explain right triangles before other interpretations of a 15ft cone.

Step #3 – Cut out your AoE shapes and trace them onto construction paper
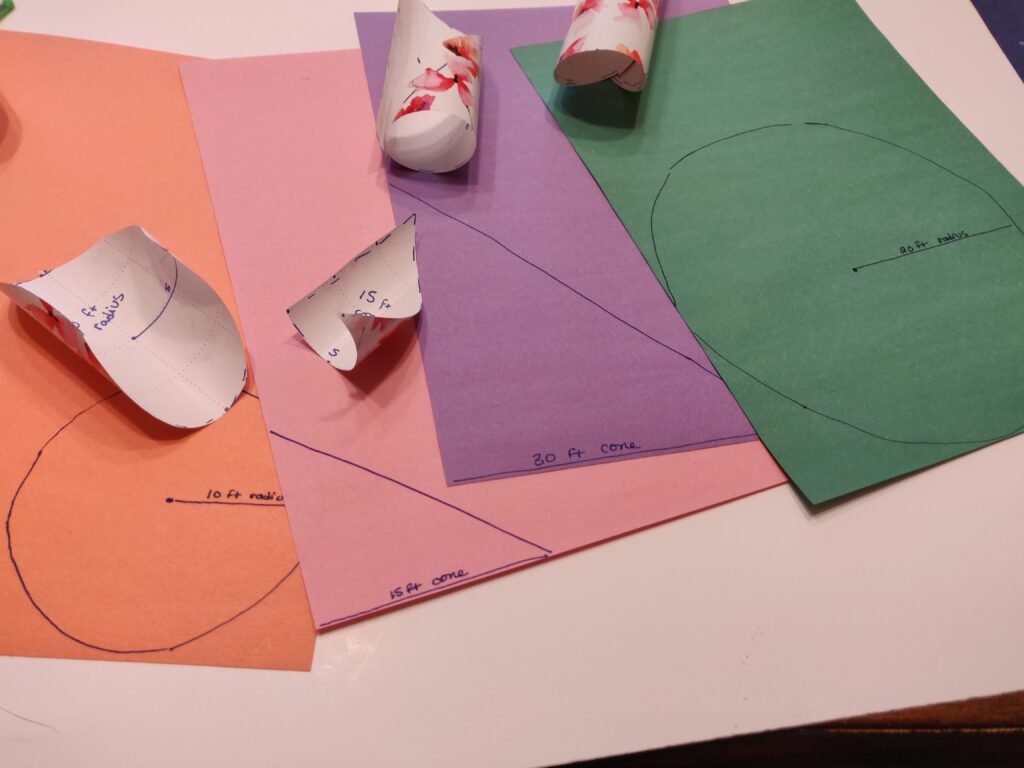
Next, I helped kiddo cut out the shapes we’d made and trace them onto different colors of construction paper. As we did this, I emphasized how even though we were moving it to a different sheet of paper, the shape and it’s measurements still stayed the same.
After we traced them, I again drew the radius or leg lines on the shapes and labeled them, except this time, I kept the label along the defining feature only (the radius of the circle or the leg of the triangle) to bring attention to the fact that this is what’s making the shape what it is.
While it might not seem like this is necessary (i.e. you could just use the grid), transferring them to the construction paper plus the explination did a few things for us. It helped us:
- make the game aide easier to use because it was on sturdier paper
- make it easier to distinguish the aide from the background grids when used in games
- use color coding for spells (by matching to the paper color)
- reiterate some of the points in the previous section by giving more points of contact with the material
- showcase the defining qualities of the shape (radius and leg length) as we’re playing and using the aides

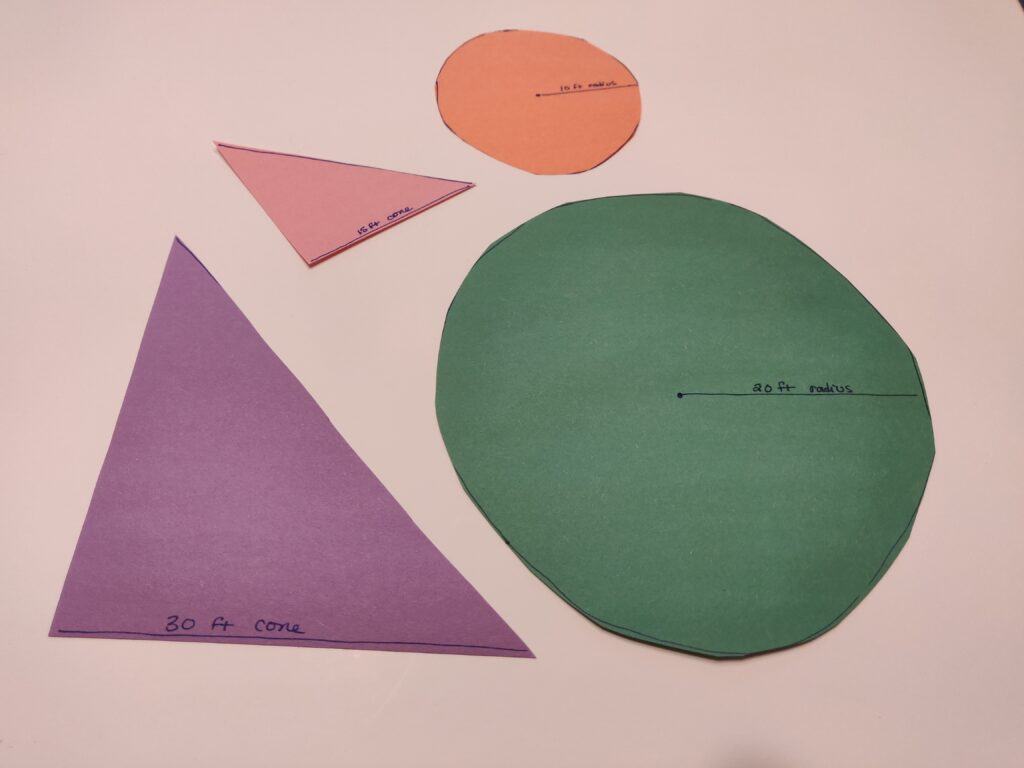
Step #4 – Cut the AoE shapes out from the construction paper and use them in you games!
This last step is pretty self explanitory, but there’s a few things you can still do here to add some further explination of your geometry concepts for your kids when they go to try out the AoE aides.
When you cut out your shapes, you’ll now have this freeform game piece that represents the spell’s zone of impact. As soon as we cut these out (so, before kiddo got tired of explinations), we tried them out on a fresh sheet of 1″ grid wrapping paper map space by moving them around and seeing how positioning the AoE aide around the casting or action point changed where the impact went.
For circles, it obviously didn’t have an impact on rotation, but if you shifted it to be part way across a square (so not exactly lining up with a point), it shifted how everything else aligned, covering partial squares at the top, bottom, and sides.
For the triangles, we showed that rotating it about the apex put the legs on a diagonal across grid squares, partially covering different squares and maybe changing the reach a little bit. This showed that 15ft or 3 squares along the grid was still 15ft or 3 squares on the shape, but it looked different on a diagonal on our map.
This step was really quick, but we were able to pack a lot of explination into it by doing some simple demos. I would set up an object (or two) a few squares away from a character piece and ask kiddo to find the best way to hit the target(s) using one spell. This was kind of like training for his character, AND it was also conceptual training for what the shapes were and represented.

Variations for your AoE game aides
What I have above is really basic stuff with just circles and triangles becuase that’s where my kid is at with our first explination of the idea, and I didn’t want to overload him. However, you can vary this quite a bit depending on your particular kid and their level.
In the future, I plan on introducing more shapes, like explaining variations on the 15ft cone, and creating 3d shapes to explain spheres, cones, and columns. You can make these out of paper, sheets of plastic, etc and explain geometry concepts similarly to what’s described above.
If you’re looking to teach more geometry concepts, you can also change the shapes of your spells (yay homebrewing!) and measure them out similarly. Some ideas for different shapes to try can be squares/cubes, hexagons, and the rhombus.
And! If you want to go even further on concepts for older kids, you could change spells to be defined as “a cube with X volume” or “a sphere with X circumference” and have players measure their shapes based on these values instead of leg/side length or a radius/diameter. This may require some math… and then would couple it with a visual representation of that math that they can see, hold, and write the equation on (so they are reminded of the concept and equations every time they use the spell).
I hope you enjoyed this craft and that you get to try it out at home or in your classroom! Happy gaming!
If you liked this post, make sure to subscribe to the TTRPGkids monthly newsletter to stay up to date on the latest reviews, tips and tricks, game and podcast list updates, and more! Thank you for playing tabletop RPGs with your kids and sharing this awesome hobby with the next generation!


1 thought on “Tips and Tricks: DIY Area of Effect Aide for TTRPGs + Geometry Lesson for Young Kids”